Touchline Instructions in Football Manager 21
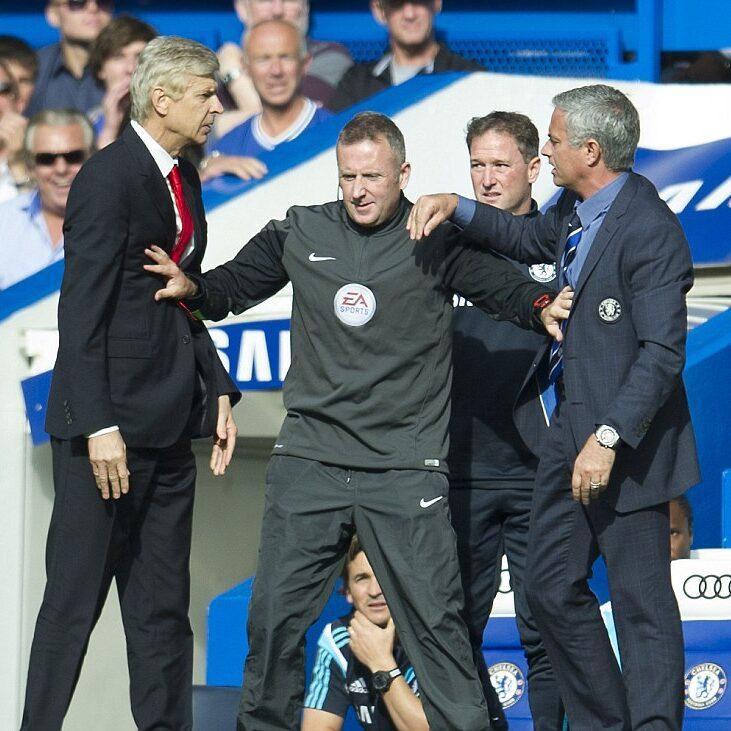
Every manager in the ‘real’ world (we all know that exists, right?) has his quirks. Those little habits on matchday; from Antonio Conte maniacally thrashing his arms, or Neil Warnock being angry at, well just about everyone. Pep Guardiola’s sauve demeanor or Marcelo Bielsa’s superstitious bucket sitting.
Well, they all have one thing in common, they all make tactical decisions. I’m talking in the moment, tactical decisions during a game of football, that influence the game. Funnily enough, Football Manager has an option to do this. Let’s find out more about how touchline instructions work in Football Manager 21.
I’m guilty (so I’m assuming some of you are too) of creating a tactic, hitting play match, and wandering off to make a brew. Not paying any attention to the game, you return to find all the stats are even, but somehow you’re on the wrong end of a 4-0 drubbing. Truth is, I notice a lot of managers playing with just the commentary; occasionally fist pumping or blaspheming as the tell-tale banner flashes a goal.
First off, that’s fine. There’s nothing wrong with commentary only, you may be hard pressed for time, or be that confident in your gameplan that you don’t need to watch. I personally view matches with comprehensive highlights, but its all down to preference. I tend to use extended highlights for the most part, occasionally switching to comprehensive in tighter or ‘big’ games. The latter showing more highlights and therefore offering a more thorough tactical overview. And this will be the one I use in the upcoming examples.
The setup
In order to really highlight the changes touchline instructions can make, I’ve removed all tactics, a ‘clean slate’ as Football Manager would call it.
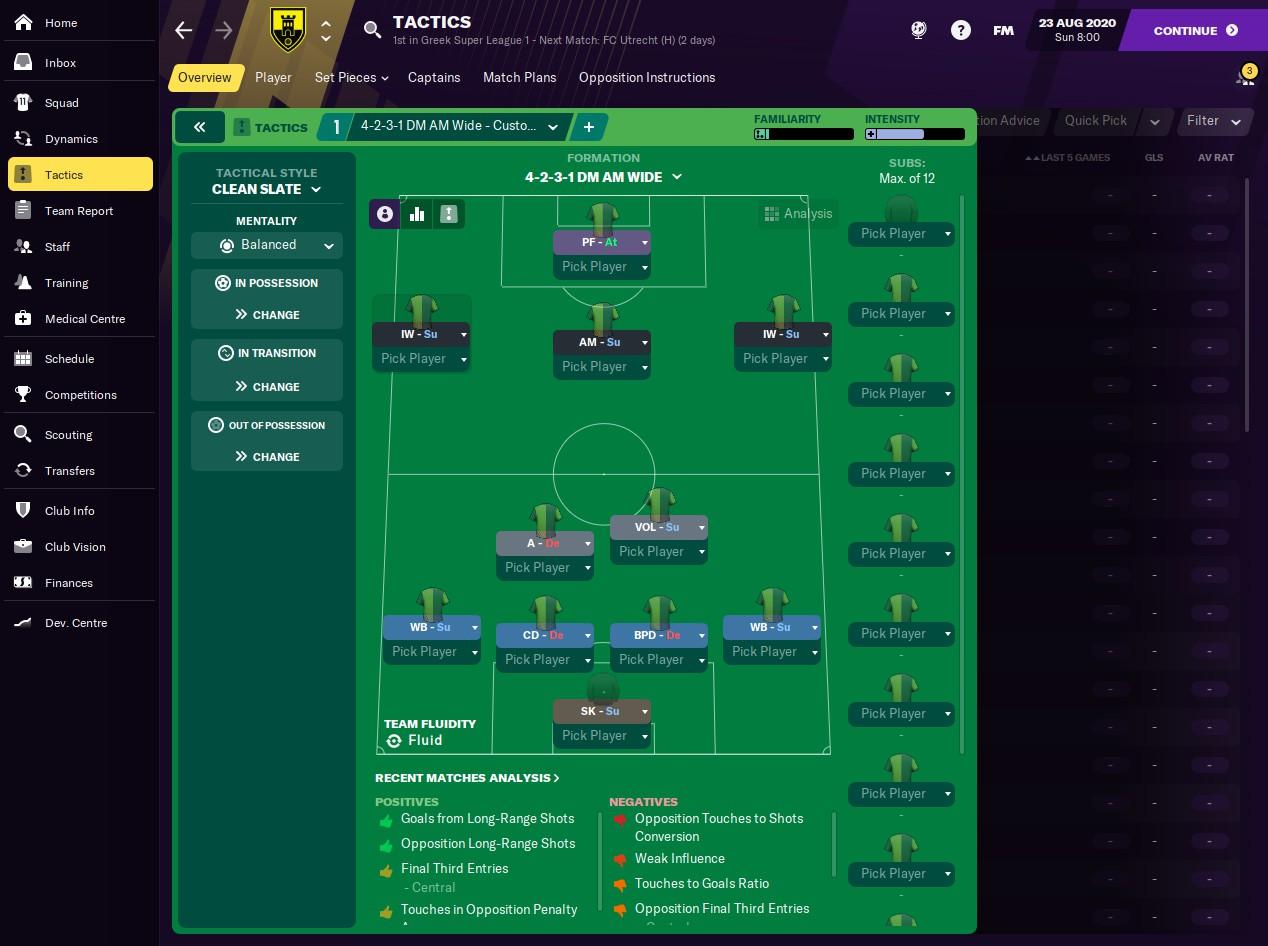
Even with a basic formation, players will still be inclined to carry out certain movements, acts, and tactical instructions. These are going to be based off player preferred moves, position suitability, and basic attributes. So even without specific team or player instructions, you may find one wing back pushes higher up the pitch or stays naturally wider than his opposite. For a true clean slate approach, I’ve removed all player instructions.
I’ve also removed all opposition instructions, I’m leaving my team to go out and do what they want. A similar tactic Ole employed against PSG last week… I digress.
The game
So, its preseason; AEK Athens hosting FC Utrecht. I’d argue the teams are evenly matched, both fielding a strong XI.
Defensive blunders
5 minutes on the clock and I’ve spotted my first tweak; a defensive one that comes early on in the game, but too late to stop me conceding.
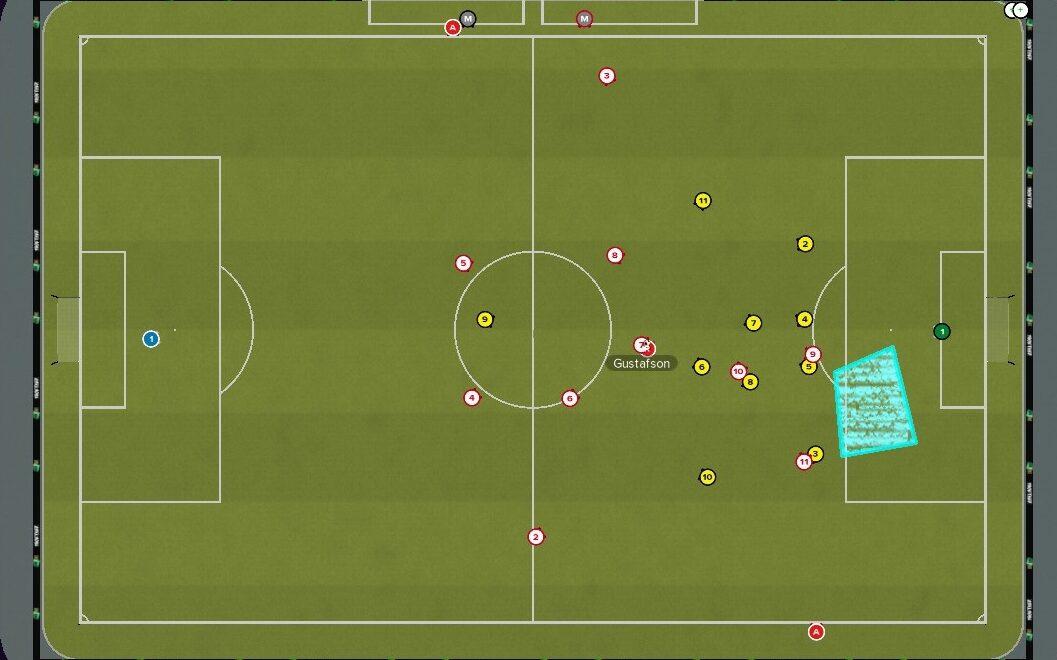
Gustafson has too much time on the ball here, in the defensive third of my pitch. He’s able to loft the ball into the shaded area, for the winger to tuck home after beating my left back to the ball. I have three midfielders set up in a triangle, to match the opponent, yet two of their midfielders are in free space.
The obvious team instructions here are to press more urgently, and mark tighter. However, we may also want to use player instructions to set up a more structured defensive approach in the midfield area. Dictating individual man marking will provide specific instructions, meaning no player should ever be without a man.
Now, I’ll implement all of those instructions, and we’ll find out as the game progresses how they work.
On the attack
Utrecht are pegged back almost immediately. Some nice build up down the right, and a neat ball into Shakhov and the balls nestling in the bottom corner.
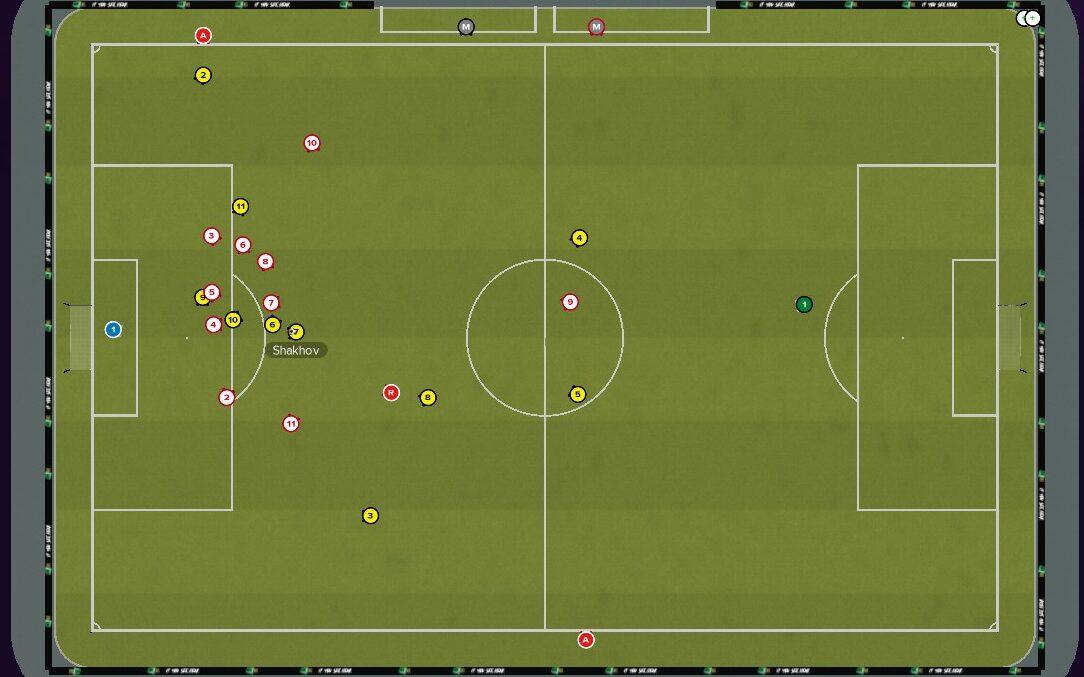
We’re happy with the leveller but, touchline instructions can be issued to try and exploit this route again. We had nice link up with our ring back and winger, so lets focus on those for now. Telling the right back to get further forward, and stay wider, supports the winger a little more. He looks as if he naturally stays wider in the picture anyway, so this will only emphasise it. This should create an overload (see Crusadertsars latest piece “Creating overloads“) on the right flank.
One thing I am intrigued about, is the lack of a winger on the opposite side of the box. Whilst in this instance, the ball ended up in the back of the net, it may have been a player more inclined to pass that received the ball. And that large space to the left of the box could be a good area to exploit. It may be worth changing the left winger instructions or role to try make him stay wider, as we’re trying to focus play down the right anyway.
Again; implement, notice the changes as the game goes on.
Half Time Oranges
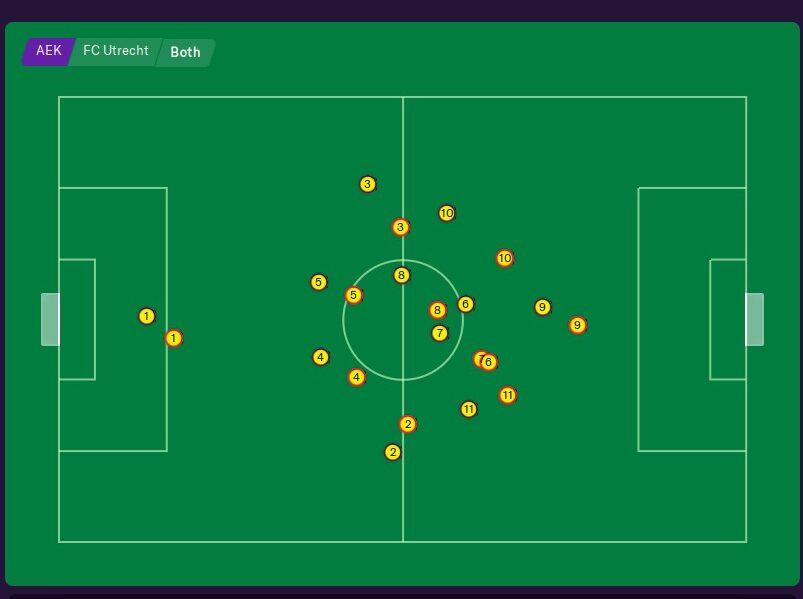
Touchline Instructions in Football Manager don’t always have to come during game time. Half time always provides a better platform to analyse your team. I always, always, ALWAYS, check the players average positions (black with ball, red without). Straight off the bat i can see my number 7 (Shahkov) is close to number 6 (Livaja) when we don’t have the ball. A quick look at the positions when we have the ball suggest that average is being dictated by an opponent. So we’ll look at his induvial instructions, to find he is man marking a player assigned to the defensive mid role. To try and spread the midfield more evenly, we can assign that player to Livaja, a player that we’d prefer to have higher up the pitch in the first place. So we’ll reassign that marking job.
You may also want to look at the kind of scoring chances you create; clear cut and half chances. Where key passes are being made, for you and your opponent. How successful crosses are into the box, and from which side. All of the tools the analysis provides can be linked to a specific tactical tweak.
The second half
By the second half your team should have a fairly structured tactic in place. You should have a good idea of how and where you want your team to attack and defend.
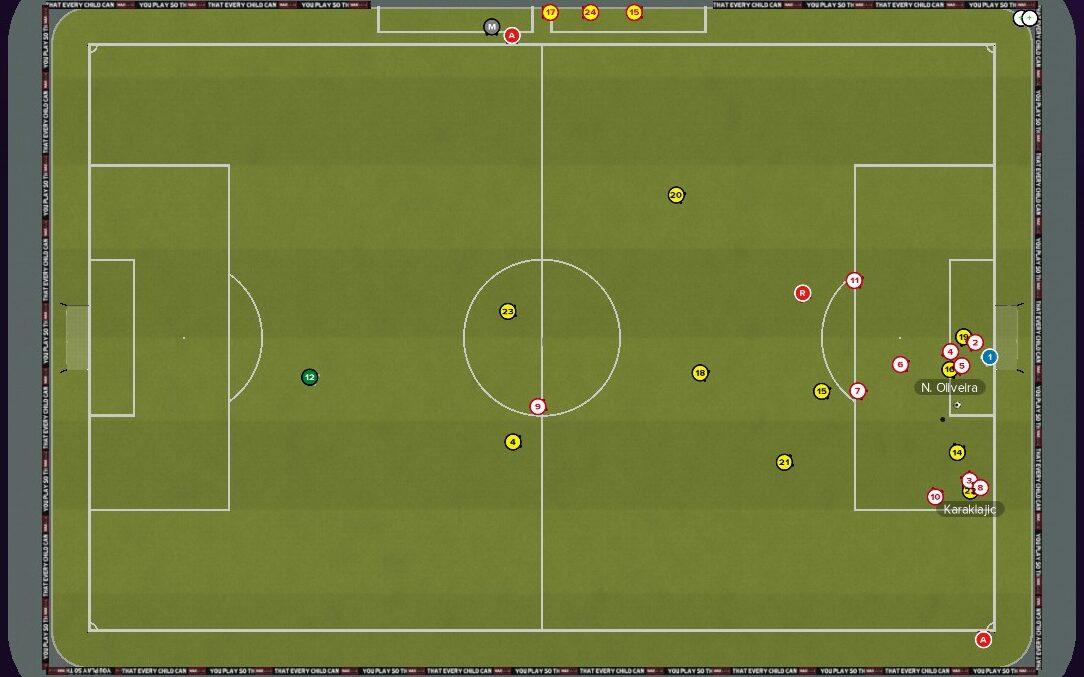
On the hour mark, the touchline instructions paid off. My right back (who we instructed earlier) is pushed high up the pitch and is actually closer to the goal than my winger (who we also instructed), the ball is forced out the to the right hand side (notice a pattern emerging?), where it is floated in for my forward to nod in at the near post. 2-1 AEK, and that’s how it finishes.
The post match whiteboard
If all goes well with your touchline instructions, the post game analysis should reflect the decisions you made. By specifying focus down a particular flank, you should notice the heat map and focus of attacks predominantly down that side. If a player is man marking, you should notice a drop in said opponents game; not as many touches, misplaced passes, fewer shots etc.
Now, i should caveat, this does not always work. You’ve taken on your arm flailing Conte role or your shouting profanities Neil Warnock role, but don’t forget the opposition manager is doing the same. They will issue touchline instructions just as you do, to influence a game. Don’t be surprised to see more balls down your left flank if you’ve told your left back to sit as far forward as he can. Touchline instructions should be always evolving and changing as a game progresses. From a shift in tactical approach, even down to a particular substitution. You aren’t going to leave CR7 unmarked on an open wing in a European semi final now, are you?! The opposition manager wants to beat you just as much as you want to beat him. Just, let the football do the talking, yeah.
Try it out in a game and let us know how you get on in the comments section.
Here’s a few more articles you might enjoy. Or you can find us on Facebook or Twitter
- Dom’s insight into Newgens – FM21 Guides: Newgen Guide for Countries and Clubs
- K19X’s wonderkids list – Transfer Window Winners: FM21 Wonderkids
- Craigs guide to setting up a new save – Setting up a save in FM21